The backup image file is a type of file that is used to store backup data, and usually we have to perform a restore operation before we can access the files stored in the backup image. In order to make it easier for users to browse the files stored in the backup image file without having to perform a restore operation, some backup software provides the ability to mount the image file, and the mounted image will appear as a local drive in Windows Explorer, so that we can easily browse and retrieve the files we need. Since different backup software usually uses its own format to store data, there is no unified way to mount different backup image files, here we will introduce how to use Hasleo Backup Suite to mount and unmount its own backup image file.
Important Notes:
1. Dokan V2.1.0.1000 may need to be installed to mount the file backup images, which you can download from the official website or from our website.
2. For Windows 7/Server 2008 R2 and earlier, Windows KB4474419 update needs to be installed to support the new driver signing (SHA-2 code signing), here is the download link for KB4474419. Please note that Windows Vista users should install the KB4474419 update for Windows Server 2008.
Limitations for Mounting File Backup Images:
1. Reparse points are not supported.
2. EFS encrypted files are not supported for file backup images generated by V4.8 and previous versions.
3. Only supports mounting file backup images on Windows 7 SP1 and later.
Below we will show you how to use Hasleo Backup Suite to mount a backup image as a local drive, after the mount is complete you can explore the files in the image file, and then unmount the mounted backup image file when you no longer need it.
Step 1. Launch Hasleo Backup Suite, click "Tools" button in the navigation bar, then click "Mount/Unmount Image" button in the operation area.

Step 2. Select the task or browse the image file you want to mount, then click "Next".

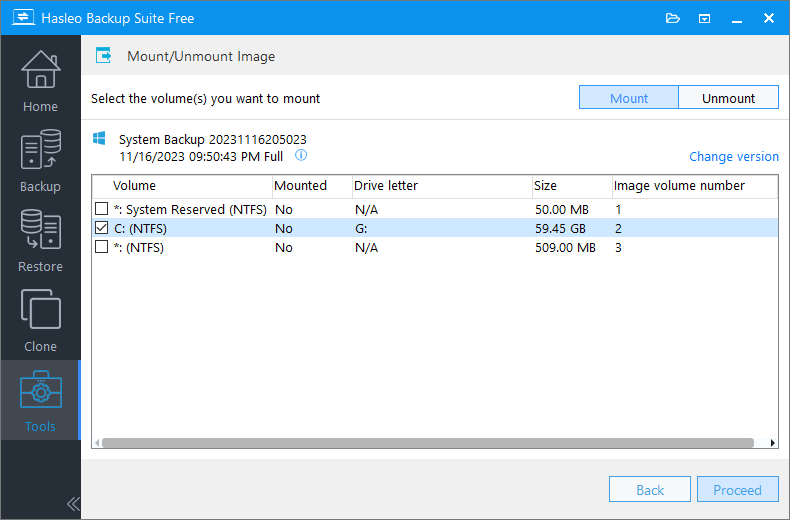
Step 3. Click the "Mount" button in the upper right corner, then select the backup image version and tick the volume you want to mount. Please note that you can choose to mount multiple volumes at once.

* Mount as writable: Check this option to mount the image file in writable mode. Please note that the changes are temporary and will be discarded after the volume is unmounted.
Step 4. Double-click the drive letter column of the selected volume, and select a drive letter from the drop-down box (you can select Auto-assign to have the program automatically assign a drive letter) for the volume to be mounted.
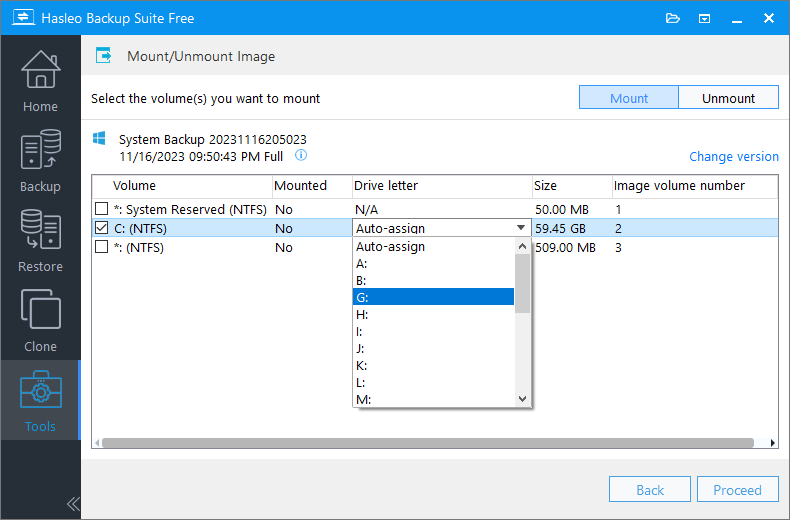
Step 5. Click "Proceed" to mount the selected image volume.
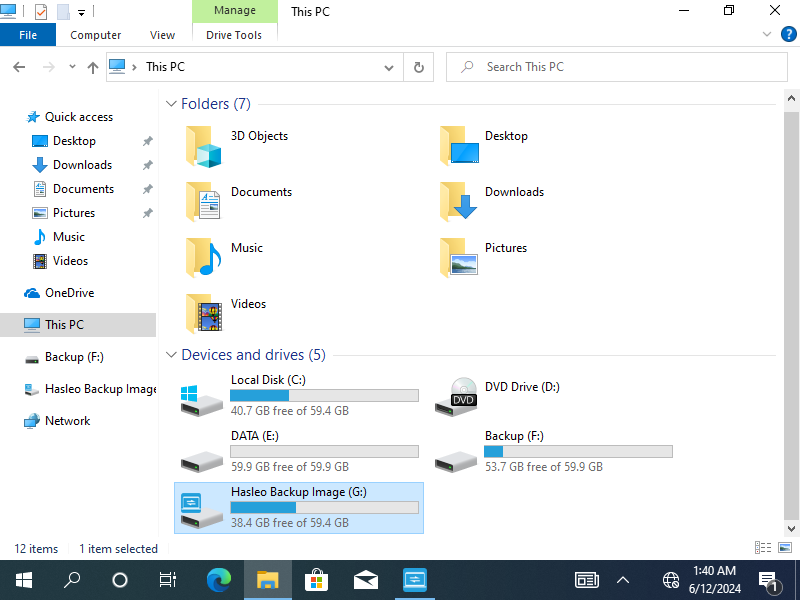
Step 6. After successful mounting, you can see the mounted disk letter in Windows Explorer and you can browse for files or copy files from the mounted drive. Please note that the mounted image volume is read-only, so you cannot write any data to that volume.
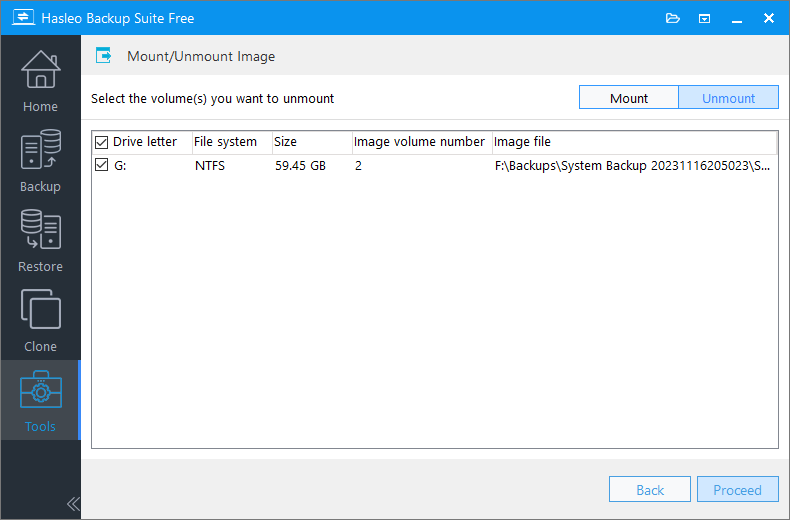
Step 7. If you don't need to access the mounted volume anymore and want to unmount it, click on the "Unmount" button in the upper right corner, then select the volume you want to unmount and finally click on "Proceed" to unmount it.
![]()
![]()


