For security reasons, I've been using BitLocker to encrypt the data partition. Recently I accidentally deleted some important files from this partition, I immediately stopped using this partition and tried to recover the data using data recovery software. I've tried several popular data recovery software that claims to recover data from BitLocker encrypted partition, but none of them helped me recover the deleted files. What I want to know is, is it possible to recover data from a BitLocker encrypted partition in Windows 8?
As an encryption tool in Windows 8 to protect important data, BitLocker Drive Encryption is really safe and effective, but it increases the difficulty of recovering data after losing data. Almost all traditional data recovery software cannot handle a BitLocker encrypted partition, although they claim to support it. Fortunately, the BitLocker encryption data recovery algorithm unique to Hasleo Data Recovery can help users recover data from a BitLocker encrypted partition in Windows 8. It's so simple and effective, you just have to follow the steps that are written in the instructions below:
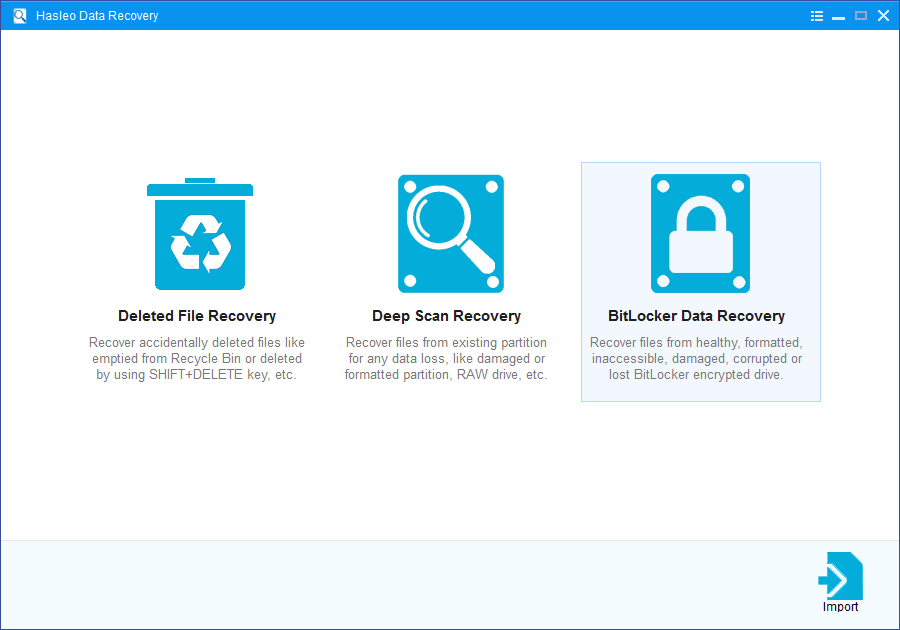
Download, install and run Hasleo Data Recovery. And you will see a screen with many options of recovery. Please select BitLocker Data Recovery mode.
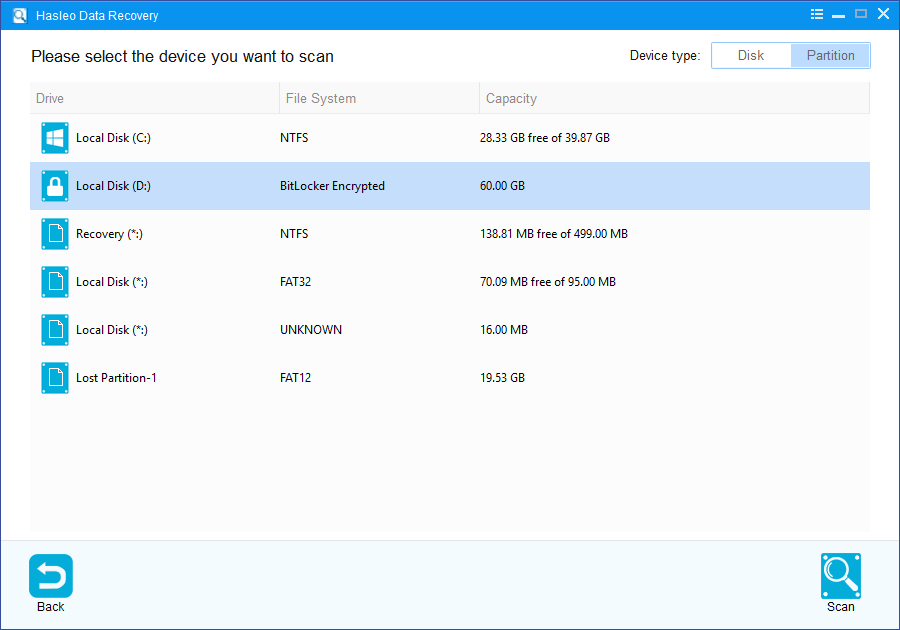
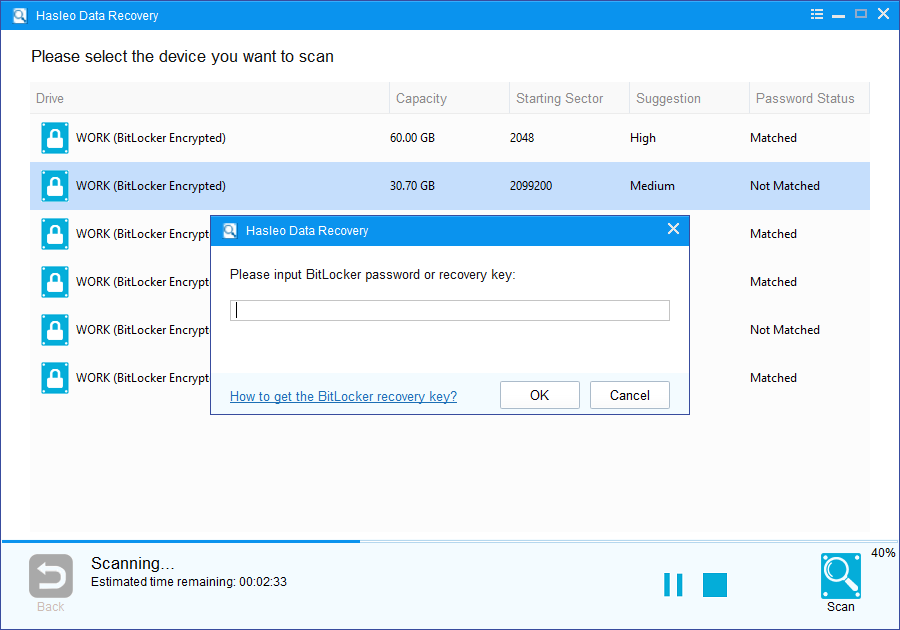
1. Please select the partition where you accidentally deleted or lose your files, then click "Scan" button to find all BitLocker encrypted partitions on the device.
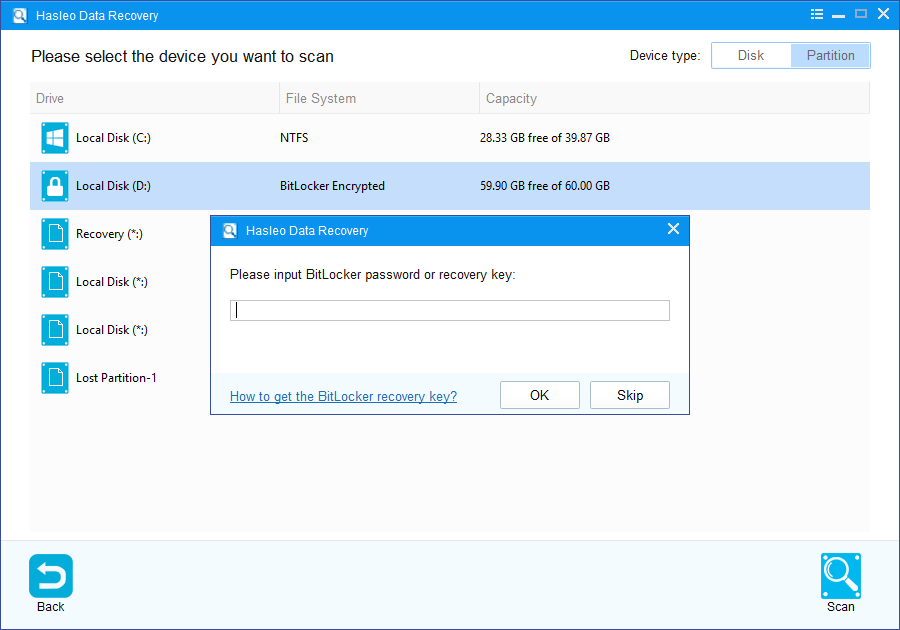
2. A pop-up window will appear asking you to enter the BitLocker password or 48-digit BitLocker recovery key. If you don't want to enter the password or BitLocker recovery key here, just click the "Skip" button to skip it.
3. Hasleo Data Recovery will list all found BitLocker encrypted partitions on the target device. If you have entered the password or BitLocker recovery key in the previous step, the password status will show whether the password or BitLocker recovery key matches this partition.
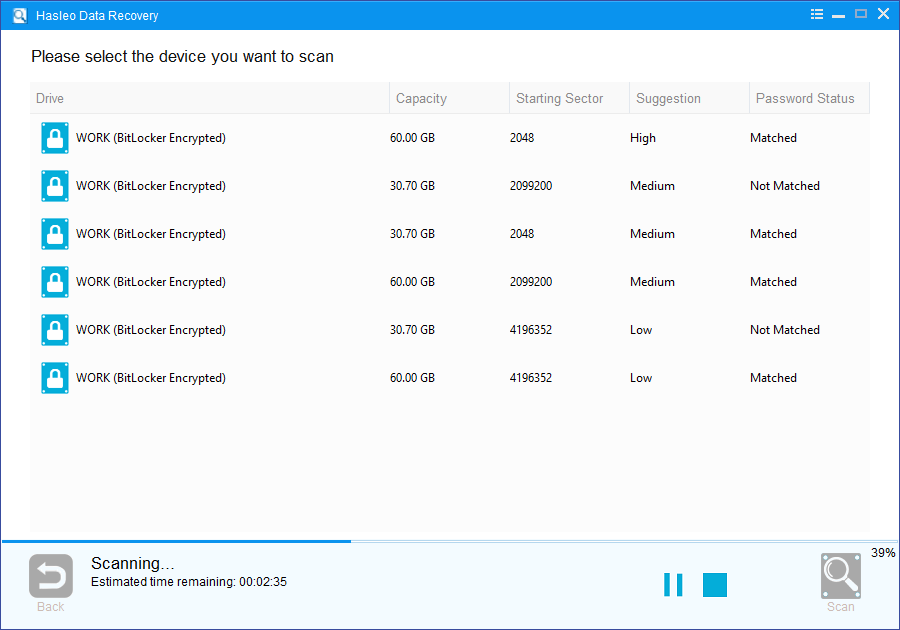
4. After the deleted or lost Bitlocker encrypted partition is found, double click it. If you have previously entered the password or BitLocker recovery key and the the password or recovery key matches, Hasleo Data Recovery will start scanning lost files. Otherwise, a pop-up window will appear asking you to enter the password or BitLocker recovery key. Enter the password or recovery key and then click "OK" button, Hasleo Data Recovery will start scanning lost files if the password or recovery key matches.
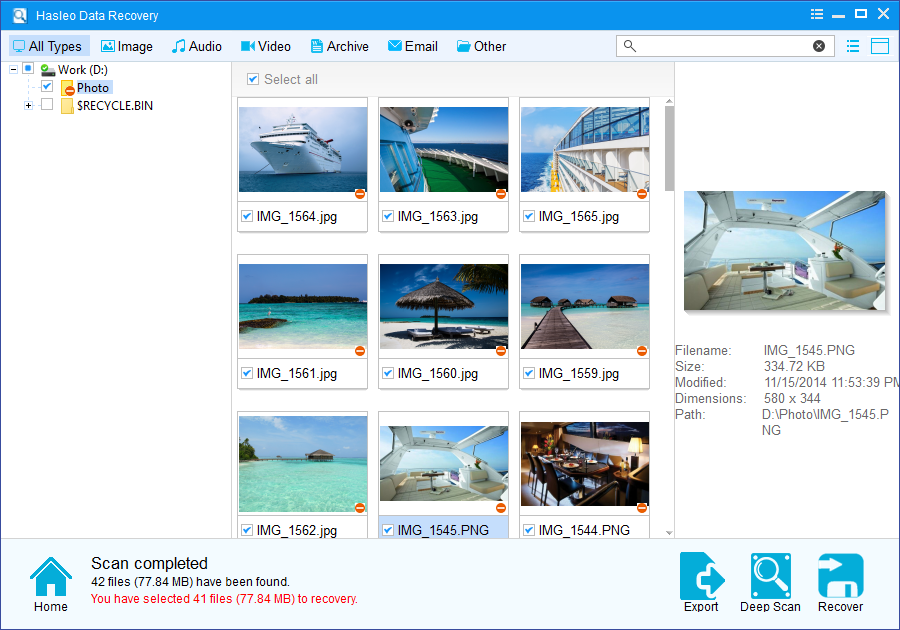
There will be a list of files found by the software, you can preview found files by path and types. Select the files you want to recover and click "Recover" button to save them. If some files are not found, please click "Deep Scan" button to start the Deep Scan Recovery process, deep scan takes more time, but can find much more lost files.
As a professional BitLocker Data Recovery software, you can not only use Hasleo Data Recovery to recover deleted files from Bitlocker encrypted partition in Windows 8, but also use it to recover data from Bitlocker encrypted drive in Windows 10/11.
Please note that: